Monday, October 28, 2019

Create Menu App Project

1. Start a new project.
2. Activity onCreate.
3. 3 Add source directly.
#Codes......... 
Code1

}

................................................................
Code2

 @Override
public boolean onCreateOptionsMenu (Menu menu){
menu.add(0, 0, 0, "About");
return true;
}

................................................................
Code3

 @Override
public boolean onOptionsItemSelected(MenuItem item){
switch (item.getItemId()){
case 0:
_move();
break;
}
return super.onOptionsItemSelected(item);

................................................................
4. Finally you will get to menu in your app.

Splash Loading Screen App Project

1. Create new project.
2. Create new XML.
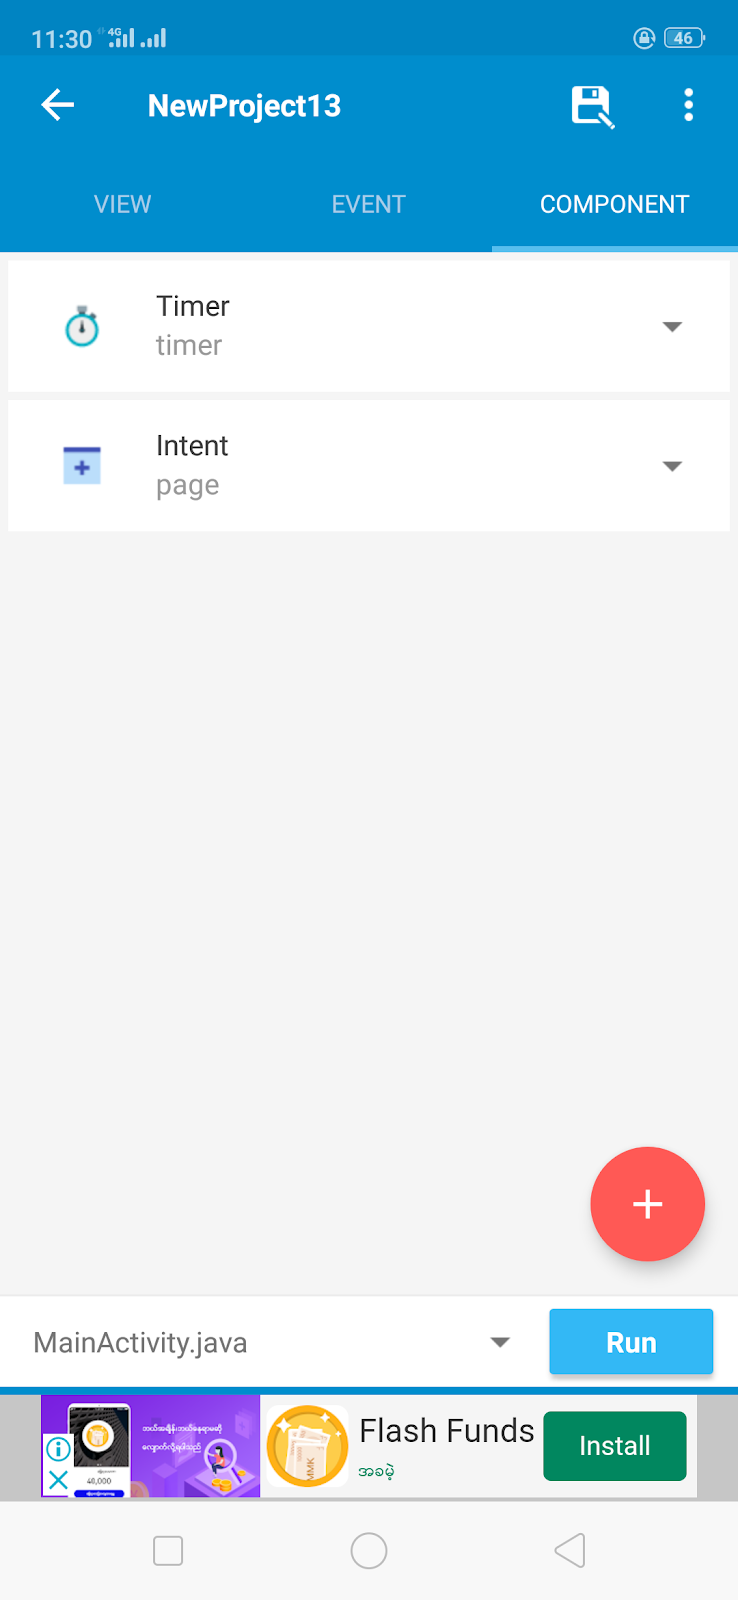
3. Create timer and intent from component.
4. Create number from variable.
5. Add ImageView for Loading.
6. Such as on photo
#OnCreate
#OnStart
#Add Component.
7. Run and save this project.


PDF Reader App Project

1. Create new project.
2. Add such as from photo.
3. Activity onCreate
Add source directly code
touch = new
ZoomableImageView(this);
linear2.addView(touch);
......................................................................
4. Add file picker from component.
5. Add button1
Add source directly code
if (renderer !=null){
renderer.close();
}
......................................................................
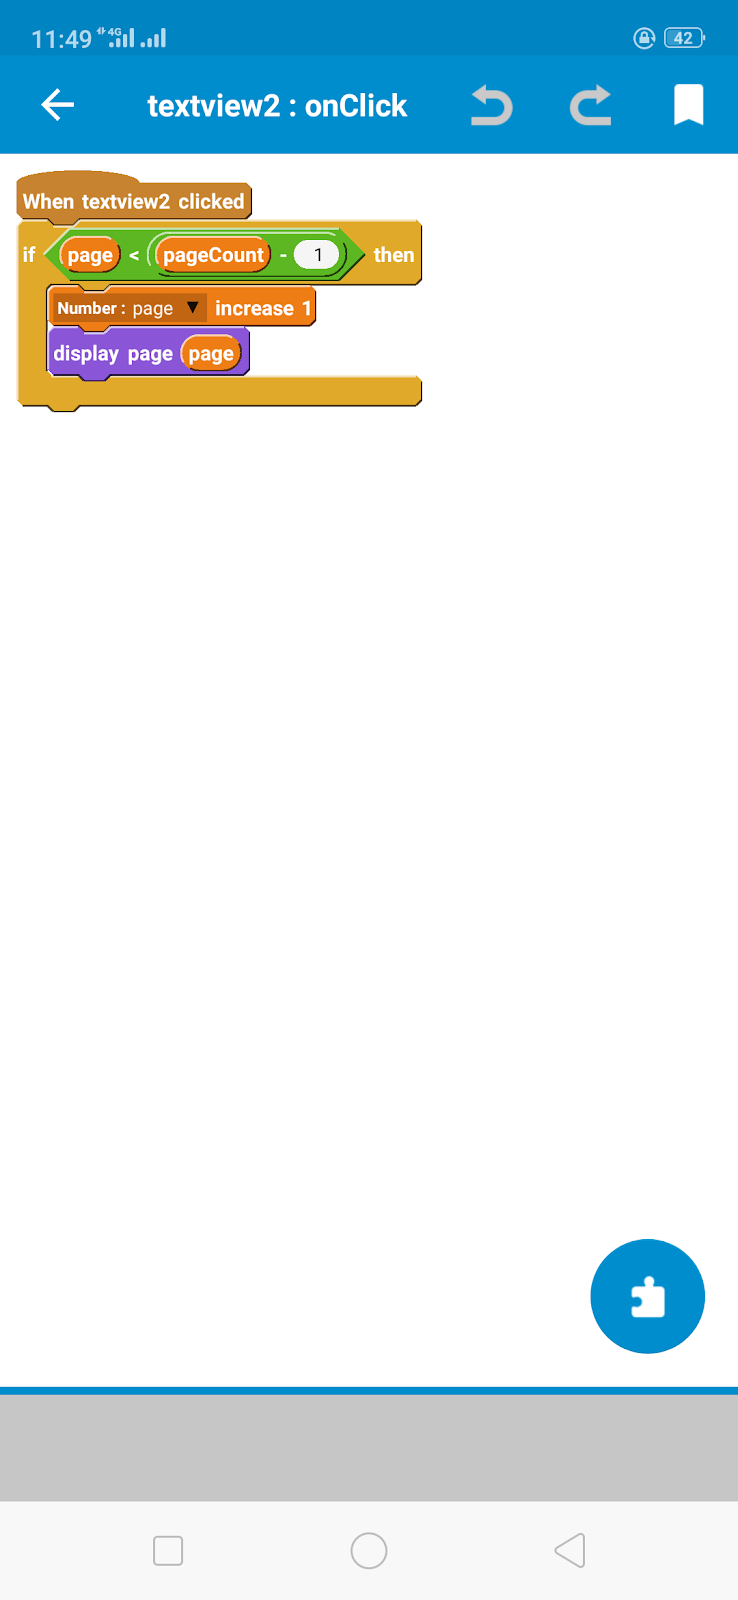
6. Add TextView1
7. Add TextView2
8. Add TextView3
9. File picker
#Code

Add source directly code 1
try {

renderer = new android.graphics.pdf.PdfRenderer(new ParcelFileDescriptor(ParcelFileDescriptor.open(new java.io.File(pdfFile), ParcelFileDescriptor.MODE_READ_ONLY)));
......................................................................

Add source directly code 2
pageCount = renderer.getPageCount();

................................................................

Add source directly code 3

} catch (Exception e){ }
......................................................................
10. display More Block
Add source directly code

android.graphics.pdf.PdfRenderer.Page page = renderer.openPage((int)_page);

Bitmap mBitmap = Bitmap.createBitmap((int)getDip(page.getWidth()), (int)getDip(page.getHeight()), Bitmap.Config.ARGB_8888);

page.render(mBitmap, null, null, android.graphics.pdf.PdfRenderer.Page.RENDER_MODE_FOR_DISPLAY);

touch.setImageBitmap(mBitmap);

page.close();
......................................................................
11. extra More Block
Add source directly codes
#Code1

}
private
android.graphics.pdf.PdfRenderer
renderer;
ZoomableImageView touch;
......................................................................
#Code2

public class ZoomableImageView extends ImageView {


Matrix matrix = new Matrix();

static final int NONE = 0;

static final int DRAG = 1;

static final int ZOOM = 2;

static final int CLICK = 3;

int mode = NONE;

PointF last = new PointF();

PointF start = new PointF();

float minScale = 1f;

float maxScale = 4f;

float[] m;

float redundantXSpace, redundantYSpace;

float width, height;

float saveScale = 1f;

float right, bottom, origWidth, origHeight, bmWidth, bmHeight;

ScaleGestureDetector mScaleDetector;

Context context;


public ZoomableImageView(Context context) {

super(context);

super.setClickable(true);

this.context = context;

mScaleDetector = new ScaleGestureDetector(context, new ScaleListener());

matrix.setTranslate(1f, 1f);

m = new float[9];

setImageMatrix(matrix); setScaleType(ScaleType.MATRIX);


setOnTouchListener(new OnTouchListener() {

@Override

public boolean onTouch(View v, MotionEvent event) {

mScaleDetector.onTouchEvent(event);

matrix.getValues(m);

float x = m[Matrix.MTRANS_X];

float y = m[Matrix.MTRANS_Y];

PointF curr = new PointF(event.getX(), event.getY());

switch (event.getAction()) {

case MotionEvent.ACTION_DOWN: last.set(event.getX(), event.getY()); start.set(last); mode = DRAG;

break;

case MotionEvent.ACTION_POINTER_DOWN: last.set(event.getX(), event.getY()); start.set(last);

mode = ZOOM;

break;

case MotionEvent.ACTION_MOVE:

if (mode == ZOOM || (mode == DRAG && saveScale > minScale)) {

float deltaX = curr.x - last.x;

float deltaY = curr.y - last.y;

float scaleWidth = Math.round(origWidth * saveScale);

float scaleHeight = Math.round(origHeight * saveScale);

if (scaleWidth < width) {

deltaX = 0;

if (y + deltaY > 0) deltaY = -y;

else if (y + deltaY < -bottom) deltaY = -(y + bottom);

} else if (scaleHeight < height) {

deltaY = 0;

if (x + deltaX > 0) deltaX = -x;

else if (x + deltaX < -right) deltaX = -(x + right);

} else {

if (x + deltaX > 0) deltaX = -x;

else if (x + deltaX < -right) deltaX = -(x + right);

if (y + deltaY > 0) deltaY = -y;

else if (y + deltaY < -bottom) deltaY = -(y + bottom);

}

matrix.postTranslate(deltaX, deltaY);

last.set(curr.x, curr.y);

}

break;

case MotionEvent.ACTION_UP:

mode = NONE;

int xDiff = (int) Math.abs(curr.x - start.x);

int yDiff = (int) Math.abs(curr.y - start.y);

if (xDiff < CLICK && yDiff < CLICK) performClick();

break;

case MotionEvent.ACTION_POINTER_UP:

mode = NONE;

break;

}

setImageMatrix(matrix);

invalidate();

return true;

}

});

}


@Override

public void setImageBitmap(Bitmap bm) {

super.setImageBitmap(bm);

bmWidth = bm.getWidth();

bmHeight = bm.getHeight(); }


public void setMaxZoom(float x) {

maxScale = x; }


private class ScaleListener extends ScaleGestureDetector.SimpleOnScaleGestureListener {

@Override

public boolean onScaleBegin(ScaleGestureDetector detector) {

mode = ZOOM;

return true;}

@Override

public boolean onScale(ScaleGestureDetector detector) {

float mScaleFactor = detector.getScaleFactor();

float origScale = saveScale;

saveScale *= mScaleFactor;

if (saveScale > maxScale){

saveScale = maxScale;

mScaleFactor = maxScale / origScale;

} else if (saveScale < minScale) {

saveScale = minScale;

mScaleFactor = minScale / origScale;}

right = width * saveScale - width - (2 * redundantXSpace * saveScale);

bottom = height * saveScale - height - (2 * redundantYSpace * saveScale);

if (origWidth * saveScale <= width || origHeight * saveScale <= height) {

matrix.postScale(mScaleFactor, mScaleFactor, width / 2, height / 2);

if (mScaleFactor < 1) {

matrix.getValues(m);

float x = m[Matrix.MTRANS_X];

float y = m[Matrix.MTRANS_Y];

if (mScaleFactor < 1) {

if (Math.round(origWidth * saveScale) < width) {

if (y < -bottom) matrix.postTranslate(0, -(y + bottom));

else if (y > 0) matrix.postTranslate(0, -y);

} else {

if (x < -right) matrix.postTranslate(-(x + right), 0);

else if (x > 0) matrix.postTranslate(-x, 0);}

}

}

} else {

matrix.postScale(mScaleFactor, mScaleFactor, detector.getFocusX(), detector.getFocusY()); matrix.getValues(m);

float x = m[Matrix.MTRANS_X];

float y = m[Matrix.MTRANS_Y];

if (mScaleFactor < 1) {

if (x < -right) matrix.postTranslate(-(x + right), 0);

else if (x > 0) matrix.postTranslate(-x, 0);

if (y < -bottom) matrix.postTranslate(0, -(y + bottom));

else if (y > 0) matrix.postTranslate(0, -y);}

}

return true;

}

}


@Override

protected void onMeasure (int widthMeasureSpec, int heightMeasureSpec) {

super.onMeasure(widthMeasureSpec, heightMeasureSpec);

width = MeasureSpec.getSize(widthMeasureSpec);

height = MeasureSpec.getSize(heightMeasureSpec);

float scale;

float scaleX = width / bmWidth;

float scaleY = height / bmHeight;

scale = Math.min(scaleX, scaleY); matrix.setScale(scale, scale); setImageMatrix(matrix);

saveScale = 1f;

redundantYSpace = height - (scale * bmHeight) ;

redundantXSpace = width - (scale * bmWidth);

redundantYSpace /= 2;

redundantXSpace /= 2; matrix.postTranslate(redundantXSpace, redundantYSpace);

origWidth = width - 2 * redundantXSpace;

origHeight = height - 2 * redundantYSpace;

right = width * saveScale - width - (2 * redundantXSpace * saveScale);

bottom = height * saveScale - height - (2 * redundantYSpace * saveScale); setImageMatrix(matrix);}

}

......................................................................
#Code3

   {

......................................................................
12. Finally run this app.

Sunday, October 27, 2019

Captcha App Project

1. Start new project.
2. You add Timer and Intent from Component.
3. You see on photo.

4. Save and run your create app.


Uninstaller App Project

1. Create new one project.
2. You pick to ListView.
3. Add source directly 2 items Event in Activity onCreate.
4. Codes
    
#Code 1
.............

Notification.Builder mBuilder = new Notification.Builder(Main1Activity.this);
mBuilder.setSmallIcon(R.drawable.easyuninstaller);
mBuilder.setContentTitle("Easy Uninstaller");
mBuilder.setContentText("You will easy to use.");
mBuilder.setDefaults( Notification.DEFAULT_SOUND | Notification.DEFAULT_VIBRATE);

NotificationManager notificationManager = (NotificationManager) getSystemService(Context.NOTIFICATION_SERVICE);

Intent notificationIntent = new Intent(getApplicationContext(),Main1Activity.class);
PendingIntent pendingIntent = PendingIntent.getActivity(getApplicationContext(), 0, notificationIntent, Intent.FLAG_ACTIVITY_NEW_TASK);

mBuilder.setContentIntent(pendingIntent).setAutoCancel(true);
notificationManager.notify(1, mBuilder.build());

................................................................

#Code 2
.............

Intent startupIntent = new Intent(Intent.ACTION_MAIN); startupIntent.addCategory(Intent.CATEGORY_LAUNCHER);  final android.content.pm.PackageManager pm = getPackageManager(); List<android.content.pm.ResolveInfo> activities = pm.queryIntentActivities(startupIntent,0);    Collections.sort(activities, new Comparator<android.content.pm.ResolveInfo>() {  public int compare(android.content.pm.ResolveInfo a, android.content.pm.ResolveInfo b) {  android.content.pm.PackageManager pm = getPackageManager();  return String.CASE_INSENSITIVE_ORDER.compare(  a.loadLabel(pm).toString(),  b.loadLabel(pm).toString());  }  });    ArrayAdapter<android.content.pm.ResolveInfo> adapter = new ArrayAdapter<android.content.pm.ResolveInfo>(  this, android.R.layout.simple_list_item_1, activities) {  public View getView(int pos, View convertView, ViewGroup parent) { TextView tv = new TextView(Main1Activity.this);  android.content.pm.ResolveInfo ri = getItem(pos);  tv.setText(ri.loadLabel(pm));  LinearLayout lin = new LinearLayout(Main1Activity.this);ImageView iv = new ImageView(Main1Activity.this);iv.setImageDrawable(ri.loadIcon(pm));lin.addView(iv);lin.addView(tv);tv.setGravity(Gravity.CENTER_VERTICAL);tv.setPadding(16,0,0,0);tv.setTextSize(18);tv.setLayoutParams(new LinearLayout.LayoutParams(LinearLayout.LayoutParams.MATCH_PARENT,LinearLayout.LayoutParams.MATCH_PARENT ));LinearLayout.LayoutParams p = new LinearLayout.LayoutParams(LinearLayout.LayoutParams.WRAP_CONTENT,LinearLayout.LayoutParams.MATCH_PARENT);p.width = 70;p.height = 70;p.bottomMargin = 55;p.topMargin = 55;iv.setLayoutParams(p);lin.setPadding(6,6,6,6);return lin;  }  };  listview1.setAdapter(adapter); listview1.setOnItemClickListener(new AdapterView.OnItemClickListener() {  @Override public void onItemClick(AdapterView adapter, View v, int position, long id) { android.content.pm.ResolveInfo resolveInfo = (android.content.pm.ResolveInfo)adapter.getItemAtPosition(position);  android.content.pm.ActivityInfo activityInfo = resolveInfo.activityInfo;  if (activityInfo == null) return;  Uri packageURI = Uri.parse("package:".concat(activityInfo.applicationInfo.packageName)); Intent uninstallIntent = new Intent(Intent.ACTION_DELETE, packageURI); startActivity(uninstallIntent); }  });;

................................................................

5. Finally you save and run this app.


Double touch Exit App Project

1. Create New Project.
2. Add onBackPressed Event from Activity.
3. Add Number from Variable.
4. Add Timer from Component.
5. You show on photo.
 
6. Save and run.

Swipe App Project

1.Open create project.
2.You see on photo.
Code 1 #Add source directly code

linear1.setOnTouchListener(new View.OnTouchListener() {
@Override
public boolean onTouch(View p1, MotionEvent p2){
switch(p2.getAction()) {
case MotionEvent.ACTION_DOWN: 
y1 = p2.getY();
x1 = p2.getX();
break;
case MotionEvent.ACTION_UP: 
y2 = p2.getY();
x2 = p2.getX();

if (((x1 - x2) < -250)) {
Intent intent = new Intent(MainActivity.this, TutorialActivity.class); MainActivity.this.startActivity(intent);
if (((x2 - x1) < -250)) {
Intent intent = new Intent(MainActivity.this, TutorialActivity.class); MainActivity.this.startActivity(intent);
}
break;
}
return true;
}});

//Create Number Variable y1, y2, x1, x2

................................................................

Code 2 #Add source directly code


ObjectAnimator anim = ObjectAnimator.ofFloat(text, "Alpha", 0, 1);
anim.setDuration(500);
anim.start();

................................................................

3. Save and run this app.

Stopwatch App Project

1. Create a new project in Sketchware.

2. In VIEW area add a LinearV with width and height as match_parent, and gravity as center_horizontal, center_vertical.
• Inside this add a LinearH linear2 with width 240, height 240, padding 20, magin 8, and gravity center_horizontal, center_vertical.
• Below linear2, add two Buttons start_button and pause_button. Set their margins as 8 and text as START and PAUSE respectively.

3. Create a more block extra.

4. In the more block extra, use an add source directly blocks and put codes to declare a long variable timeWhenStopped, and a Chronometer stopclock.
}
private long timeWhenStopped = 0;
private Chronometer stopclock;
{


5. Add 5 number variables modeZERORUNNINGSTOPPEDPAUSED.

6. In onCreate event, set ZERO to 0, RUNNING to 1, STOPPED to 2, PAUSED to 3, and mode to ZERO.

After this use an add source directly block and put codes to set a GradientDrawable as background of linear2.
int strokeWidth = 5;
int strokeColor = Color.parseColor("#03dc13"); android.graphics.drawable.GradientDrawable gD = new android.graphics.drawable.GradientDrawable(); gD.setShape(android.graphics.drawable.GradientDrawable.OVAL);
gD.setStroke(strokeWidth, strokeColor);
linear2.setBackground(gD);


After this use another add source directly block and put codes to define the Chronometer and set it as View of linear2.
stopclock = new Chronometer(this);
stopclock.setTextSize(50);
linear2.addView(stopclock);

After that set the pause_button INVISIBLE.

7. In start_button onClick event, use blocks as shown in image below.
Here, if mode is ZERO, following code is used to start the Stopwatch, mode is set to RUNNING, and start_button text is set as STOP.
stopclock.setBase(SystemClock.elapsedRealtime());
stopclock.start();


If mode is RUNNING or PAUSED, following code is used to stop the Stopwatch and mode is set to STOPPED and start_button text is set as RESET.
stopclock.stop();

If mode is STOPPED, following code is used to reset the Stopwatch and mode is set to ZERO, and start_button text is set as START.
stopclock.setBase(SystemClock.elapsedRealtime());
timeWhenStopped = 0;


8. In pause_button onClick event, use blocks as shown in image below.

Here is mode is RUNNING following code is used to pause the Stopwatch, mode is set to PAUSED and pause_button text is set as RESUME.
timeWhenStopped = stopclock.getBase() - SystemClock.elapsedRealtime();
stopclock.stop();


If mode is PAUSED, following code is used to resume the Stopwatch and mode is set to RUNNING, and pause_button text is set as PAUSE.
stopclock.setBase(SystemClock.elapsedRealtime() + timeWhenStopped);
stopclock.start();


7. Save and Run the project. You will see the stopwatch on the main page. On clicking the start_button it starts, and on clicking the pause_button it stops but can be resumed.